
|
RPX Technologies announces that its DynaVibe and DynaTrack optical blade tracking accessory have been accepted by the Robinson Helicopter Company for R22-series and R44-series helicopter tracking and balancing purposes. During the 2018 HAI Heli-Expo, RPX personnel will demonstrate DynaVibe and DynaTrack in booth C4043. This complete track and balance system is simple-to-use, allows users to complete the process quickly, and is priced at less than $7,000 making it the most affordable track and balance system on the market.  DynaTrack is now a Robinson-accepted solution for R22 and R44 series helicopter tracking and balancing. RPX provides application notes specifically for Robinson, and the DynaVibe system has built-in setup information for R22-series and R44-series helicopters, streamlining the track and balance process.
“I have used the DynaVibe multiple times to adjust the Robinson R22 track and balance of the main blades, balance the scroll/squirrel cage fan and balance the tail rotor,” stated Mark Young of Tropic Airpower. “I actually got the tail rotor to 0.00 IPS with the DynaVibe. It is very easy to set up. I love the option of being able to take multiple readings per ground run and in-flight checks. Keeping the track and balance correct ensures good reliability of all components on the helicopter. This is a great instrument; I’m very satisfied over all.” To learn more about using DynaVibe and DynaTrack with your R22 or R44-series Robinson helicopter, contact us using the yellow tab below. Absolute Aero, with its team of experienced, FAA-licensed A&P and IA mechanics, specializes in maintaining, upgrading, and inspecting a broad range of single and multi-engine aircraft. Working from the Hayward Executive Airport (KHWD), the company uses a DynaVibe GX3 to provide dynamic balancing services to its customers, keeping the revenue in house for these procedures that they used to send out to a prop shop. 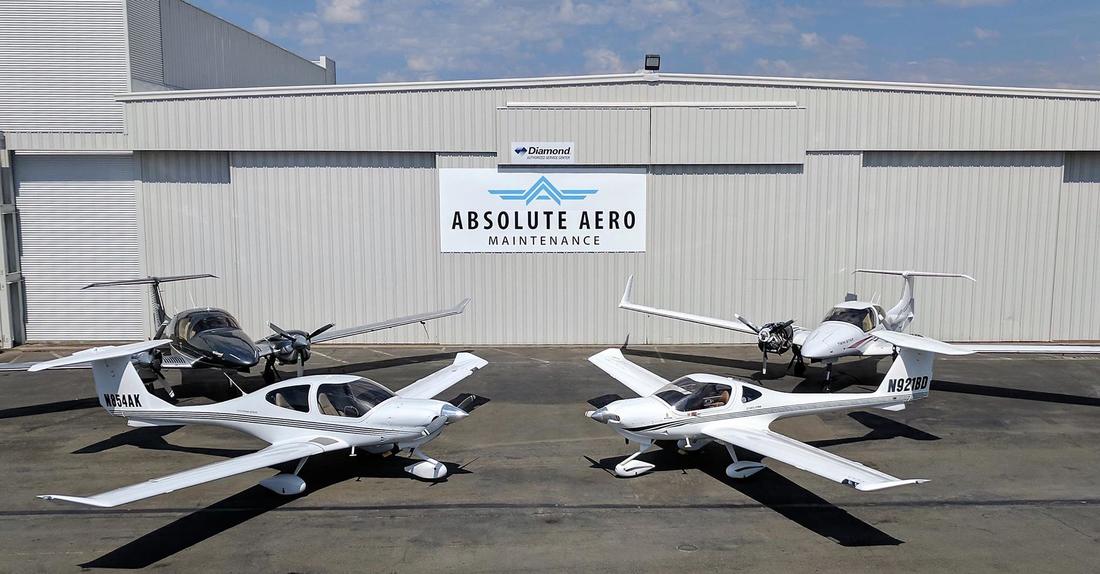 The home of Absolute Aero Maintenance at KHWD. In fact, the difficulty scheduling work through the local prop shop provided Brandon Thompson with motivation to purchase DynaVibe. “We'd always used our local propeller shop but it was too hard to schedule them when we needed them and that's why we looked into buying our own equipment.” Absolute Aero now uses DynaVibe on a regular basis, balancing a prop on average every month. DynaVibe makes dynamic propeller balancing easy. “It is intuitive, and if you just do what it says and you let it find its own solution, it does work very well,” said Thompson. In addition to making the balancing process simple, the DynaVibe GX3 streamlines the process as well through its automatic weight solution calculation feature: “There have been times where it has taken six or seven runs to get it nailed down, but a lot of times it's one or two runs and we nail it down right away.” 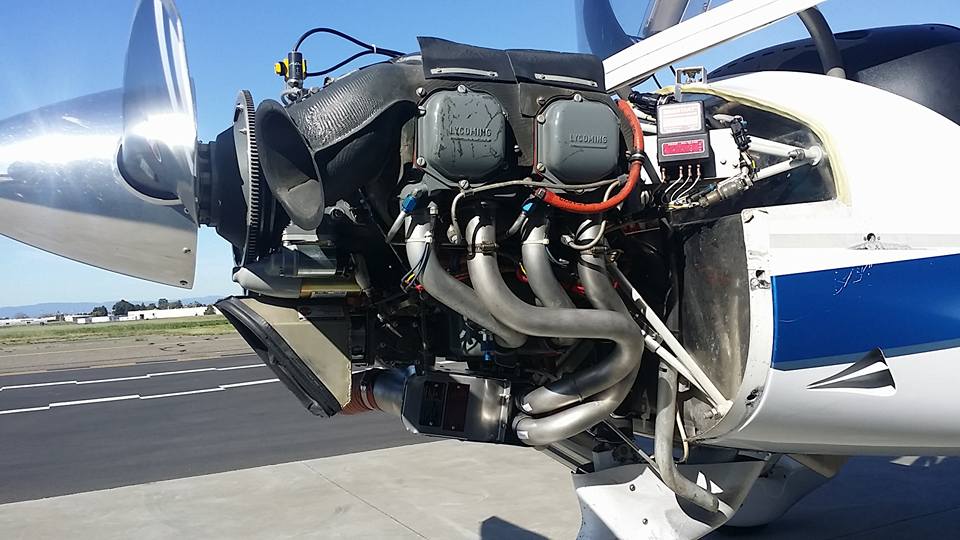 Lycoming engine setup for dynamic balancing (phototach and DynaVibe accelerometer visible). Thompson’s experience validates industry data that many general aviation aircraft – up to 80% – are flying around with out-of-balance props. Because of the prevalence of unbalanced props, Absolute Aero’s customers feel a difference after balancing with DynaVibe. “I actually balanced one and the owner didn't know that we had done it. He came in after flying it and he's like, ‘you must have balanced it, because it's a whole new airplane!’ We enjoy using it. When you are able to let DynaVibe process what's actually happening and follow it to the solution, it does very well.”
With high performance airboats, the raw power can approach 1000 HP. As with aircraft, an unbalanced airboat propeller will quickly turn some percentage of that raw power into damaging or even catastrophic vibrations. RPX Technologies recently spoke with Steve Boser, Sensenich VP of Engineering, about using the DynaVibe GX to balance an 850 HP airboat. 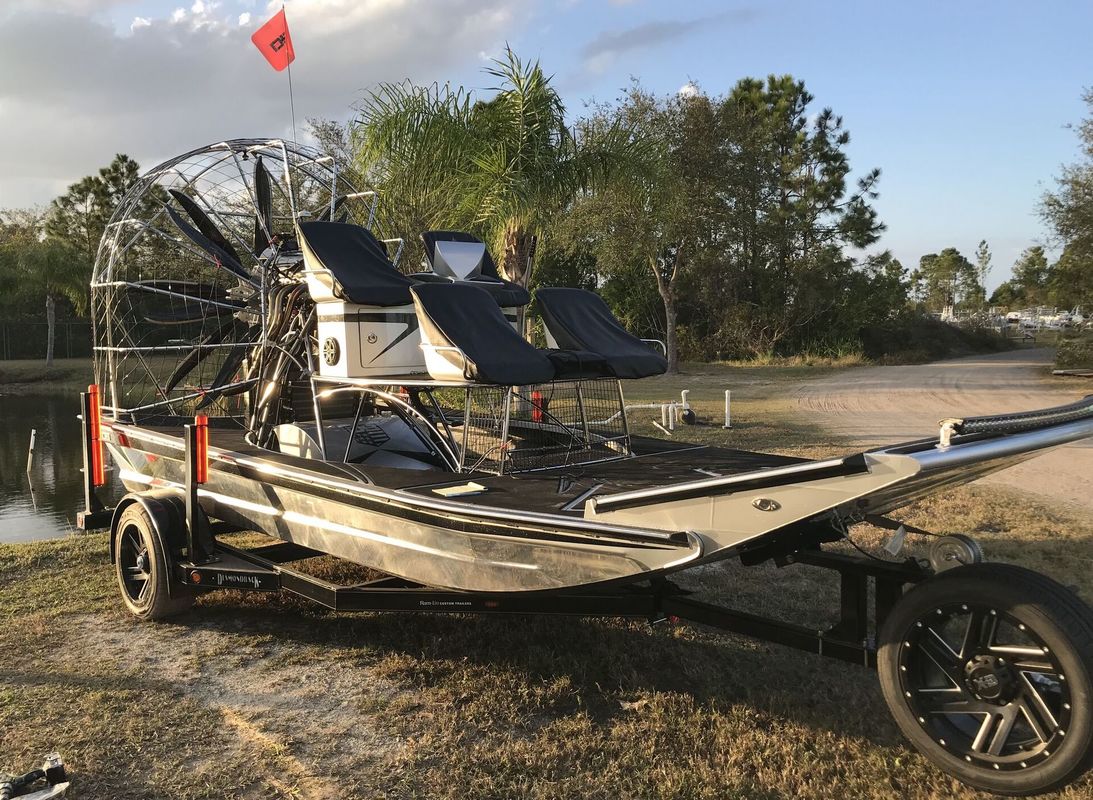 Sensenich Propeller Manufacturing Company manufacturers lines of propellers out of carbon fiber, aluminum, wood, or wood composites for aircraft, UAVs, and airboats. Of course, Sensenich propellers are statically balanced during manufacturing and subsequent servicing. However, as with any prop, a dynamic balance after installation can balance the influence of the entire rotating assembly into which that prop is now integrated.
A Sensenich customer that manufacturers airboats was encountering some balancing challenges with their assembly. “My airboat sales manager reached out” says Boser. “He said ‘Hey, is there anything we can do to help these guys out? I don’t think it’s a static balance issue. It’s a pretty novel installation.’” “There’s a total of 16 blades,” says Boser. “That’s an eight-bladed propeller on the front. Then there’s an eight-bladed propeller on the back. There’s a coaxial shaft. You have a front shaft with a big hollow space in it, and then you’ve got a smaller shaft that sticks through it to the rear prop. They turn in opposite directions. The marine [airboat] guys call it a counter rotator. The aircraft guys call them contra rotating.” Boser’s engineering team already had a DynaVibe GX for use as an engineering tool with spectral analysis. “Also, to help us in refining procedures for static balance,” says Boser. Sensenich agreed to send Boser, along with the DynaVibe GX, to help troubleshoot this contra-rotating 16-bladed 850-HP power plant. This power plant can propel the large airboat across the water at up to 80 MPH. However, before this high-performance airboat could be delivered, the vibration issues had to be tamed. Boser made some initial measurements with the GX, but there wasn’t an application note for this unique setup, so he ended up contacting Steve Sennett at RPX, the makers of DynaVibe. “I reached out to Steve,” says Boser. “and after about 20 minutes I had it all figured out.” Because of the design of the counter-rotating prop assembly, the rear prop could be removed but it was not practical to remove the front prop. Therefore, Boser first balanced the front prop with the rear prop removed and then balanced the rear prop with the now-balanced front prop in place. In this counter-rotating setup, the props are mechanically locked 1:1 in rotations, so Boser did not have to move the optical tach to balance either prop. “Half of it was getting into the routine of removing and adding weights,” says Boser. Sensenich Saber Blades are designed to mount on a Warp Drive hub. “There are four bolts that hold each blade into a plate hub. It’s like two aluminum plates that sandwich the blade pitch blocks. Once I got into the routine of getting them apart and adding the weights it went pretty fast.” “I’d get it up to cruising RPM because that’s where I wanted to ensure it was going to be nice and smooth,” says Boser. “They don’t go full throttle for a long period of time. It’s just like an aircraft, you’re going to be trucking around at cruise RPM. It was 1,100 RPM on the prop or so. It was around 3,000 RPM on the engine with a 2.68 reduction.” “I think I got the front prop in about three runs” says Boser, “and I got the rear prop in two runs. I ended up with a 0.04 IPS on it. Went very fast.” The core business of RPX is aviation -- its passion is making anything with a prop spin more smoothly to minimize damaging and uncomfortable vibrations. Whether you’re piloting an experimental canard pusher, a traditional tractor-design aircraft that pulls itself through the air, or even a Skymaster that pushes and pulls, RPX can help. Even if you are skimming around the bayou, or navigating flood waters in water-rescue operations -- DynaVibe can balance your airboat prop too. If it’s got a prop and it rotates, contact RPX to let us help you smooth out your ride and find out which DynaVibe is right for you. Warren Cilliers owns Cilliers Aviation, a maintenance business in Palatka, Florida, where he works primarily on aerobatic airplanes, such as the Extra 330SC. He also travels the world as technician for Michael Goulian and Team 99, as Goulian competes in the Red Bull Air Race World Championship. In both endeavors, Cilliers uses a DynaVibe Classic to perform dynamic propeller balancing. “Definitely used the DynaVibe and it’s really helped us out,” says Cilliers. In the past year, Cilliers estimates he has used DynaVibe to complete 40 prop balances. “That's without advertising,” says Cilliers. “It's really just my customers that come through my shop and word of mouth in the area. It's been great.” 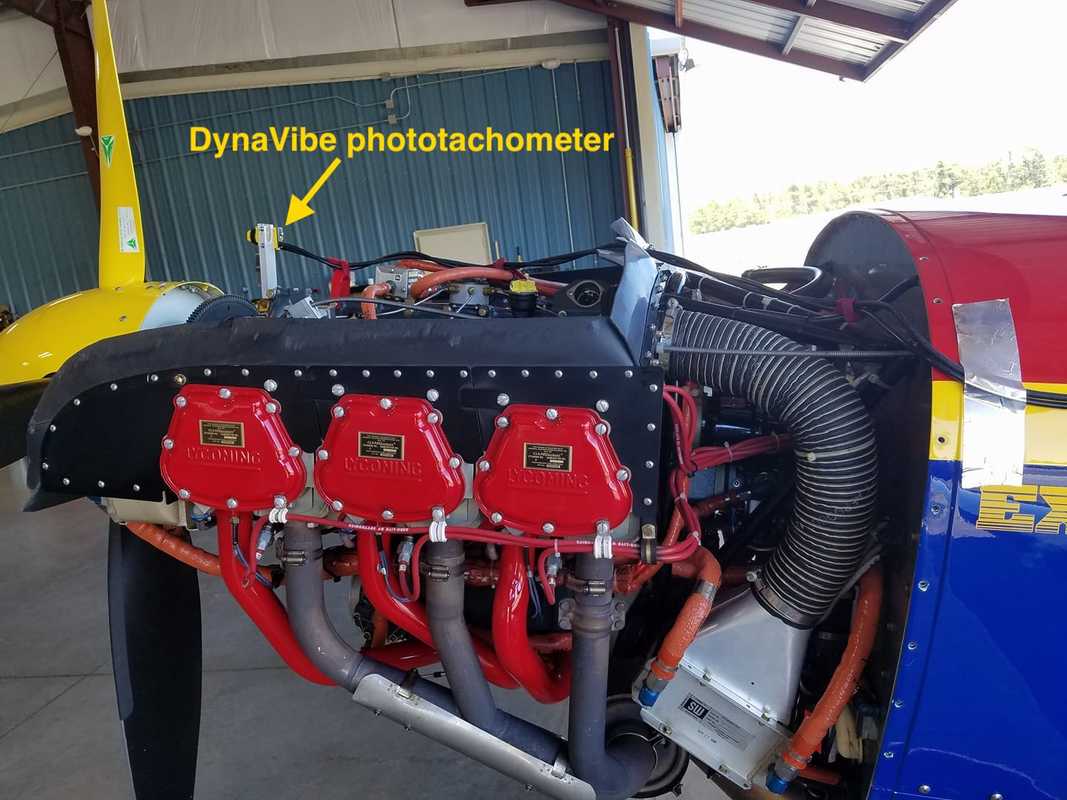 An Extra race plane in Cilliers' shop set up for balancing with DynaVibe. Cilliers understands the preventative maintenance benefits of keeping propellers balanced: “It's obviously very important on any aircraft, not only aerobatic airplanes, for fatigue and wearing of parts, gears in the engine, magnetos, everything, even going down to fatigue on the airframe, with vibration and cracks on the aluminum and things like that.” Because of the benefits, dynamic balancing with DynaVibe has become a standard procedure Cilliers does for his customers. “It's so easy to work. I've got it down to an art now, where I can just take it out in my ground run, and just balance it for them. They really appreciate it.”
Cilliers is getting great results from balancing with DynaVibe that his customers can feel. “I've never had any negative report back from any customer. Whenever I do a balance, even if it's not as much out-of-balance [to start with] – where I think the customer would not even feel it – they always report back that they notice a difference.” Customers feel the difference and get the benefits of Cillier’s balancing work. With DynaVibe, the balancing process is easy and the payback on the investment in the balancing equipment has been excellent. “The simplicity of DynaVibe makes it easy. It's been great, and well worth the $1,600 that I've spent. I've probably paid for it about 10 times already, so I’m very, very pleased with it.”  Let's go fly! ...maybe not. The current METAR made me think twice: KSWO 302253Z 03008KT 10SM BKN024 OVC030 M07/M13 A3033 Below freezing. Low clouds. Should I worry about the aircraft accumulating ice? I've read [1,2] that most aircraft icing occurs when air temperatures are between 0 °C and -20 °C and I wondered how difficult it would be to verify that claim. Here's what I found. First, I downloaded several hundred PIREPS from aviationweather.gov. Then I filtered the PIREPS for those that reported ice along with the atmospheric temperature. For example, here the pilot is reporting rime ice with an atmospheric temperature of -13 °C: TYS UA /OV TYS/TM 1331/FL130/TP E145/TA M13/IC MOD RIME ICE/RM ICING STARTING AT 130 AND ENDING AT 115 Next, I constructed a histogram of the atmospheric temperatures with reported ice, and here is the result. 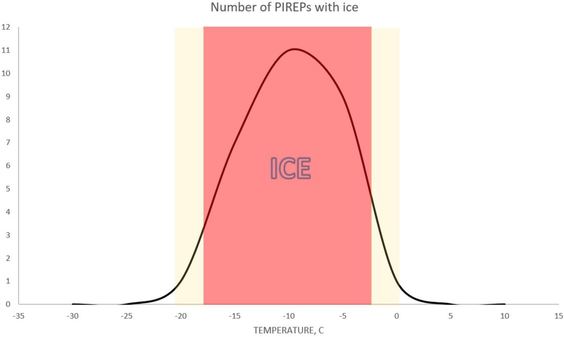 What is amazing is that this plot is comprised of just 29 pilot reports and it agrees perfectly with the original premise that aircraft structural icing occurs most often between 0 °C and -20 °C. That's good information to know before poking your head into cold clouds.
References: 1. http://www.crh.noaa.gov/Image/lmk/Brian%20S/LMK_Icing_Show.pdf 2. https://www.faasafety.gov/gslac/ALC/course_content.aspx?cID=33&sID=152&preview=true We sometimes refer to our offices here at RPX Technologies HQ as "nerdville" because our work involves lots of "techie" tools like 3D printers, laser cutters, compilers, mathematical simulation software, and an array of gadgets and electronic test equipment that bring out the inner nerd in us. So, when we get questions about the science behind how DynaVibe actually works, there's almost a competition to see who can be first to answer the question! Last week we got a question that we loved, because it lets us talk about the principles behind how DynaVibe prop balancing equipment works. Here's what came in: Q: Balance limits are usually specified in IPS (inches per second). But an accelerometer measures acceleration (G-forces) which are measured in inches per second per second (in/sec^2 [IPSS]). Which is actually measured? If it is IPS, how is that determined from the acceleration? Kudos to Tom, the submitter of this question through our [email protected] email address (where anyone is welcome to correspond with us)! Here's the answer: A: You are correct. Vibration is often measured using accelerometers, which directly measure acceleration (e.g., IPSS). Acceleration must be converted to velocity (e.g., IPS) by also considering the frequency of interest and doing the math. The DynaVibe is doing this conversion continuously using one of several methods depending on the operating mode. You may be wondering why IPS (velocity) is reported, and not IPSS (acceleration). The reason is that velocity is more indicative of machine damage from vibrations in the "thousand cycles per minute" range (for example, engine or prop RPM). While not aviation specific, various standards (notably ISO 10816) cover vibration analysis for machinery of various types, sizes, and rotating speeds. Charts like the one below (notice that velocity in IPS is on the left vertical axis) are quite common in the machinery world: 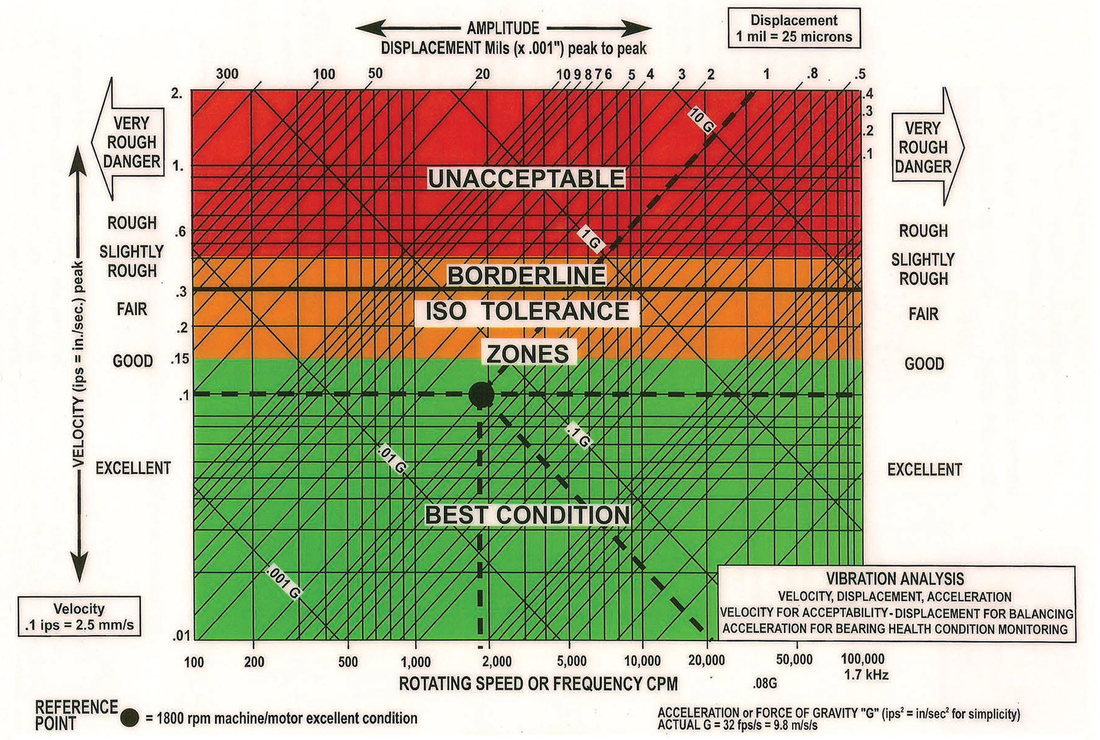 Vibration Severity Graph for General Rotating Machinery At very high frequencies (i.e., ultrasonics), acceleration is commonly used and is often reported in "g" units. (This is what the DynaVibe GX3 with Turbine Kit, with our high speed accelerometer, measures and reports in VibeSurvey and Williams modes).
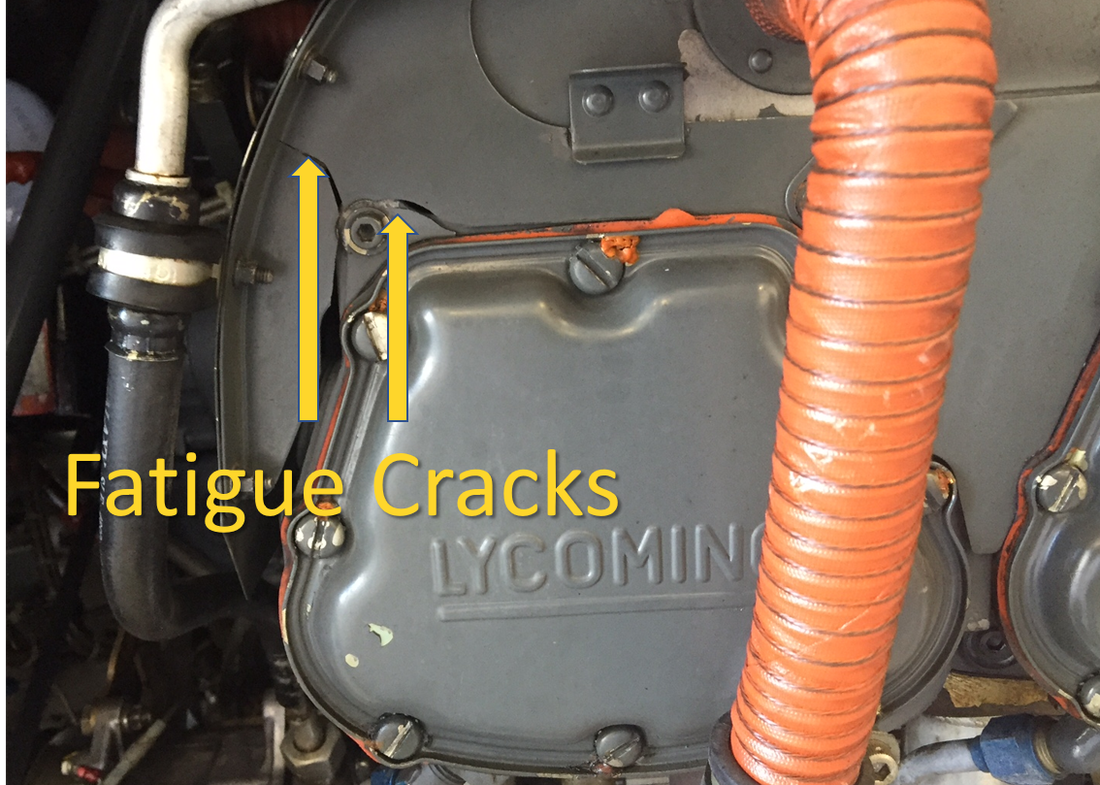
With many of the DynaVibe GX3 modes that utilize our standard accelerometer, such as Spectrum mode, we default to velocity, in IPS, with the option to switch views to acceleration, in IPSS. By the way, as frequencies get very low, displacement is used (i.e., low frequency fatigue/bending). This typically uses different instrumentation than for acceleration and velocity. How does all of this lead us back to velocity and IPS? Propellers just happen to be in that middle range shown in this graph, where velocity is the best indicator of damage and the preferred U.S. unit of measure for propeller vibration is IPS. We love getting questions like this, so if you have one you want to ask, please use our "Contact Us" form to let us know what's on your mind. An ounce of prevention is worth a pound of cure. This adage certainly applies to aircraft preventative maintenance. Take, for example, significant main rotor imbalance: it’s relatively easy to detect, because the pilot can often feel the vibrations from the imbalance in their back or the seat of their pants. This sensation usually prompts some preventative maintenance, before there is significant damage to components and impact to the bottom line. With something like a tail rotor or fan wheel imbalance, however, the vibrations are rarely identifiable in the cockpit. Fatigue cracks and an unplanned out-of-service ship may be the first, obvious sign that something is wrong. What follows is a repair that is often time-consuming, expensive, and rarely conforms to your schedule. It’s more cost-effective and operationally efficient to invest in preventative maintenance than to repair damage. Balancing fans are an aspect of preventative maintenance that can save expensive repair bills. For instance, consider the Robinson R22, where Robinson documentation states that “Fan balance must be checked upon installation; fanwheel imbalance can cause damage.” As the accompanying photographs show, this damage often reveals itself in the form of fatigue cracks in the engine cowling, requiring expensive repairs. With the proper diagnostic equipment, such as the DynaVibe GX3 dynamic balancing system, checking for fan imbalance becomes a relatively simple procedure. You can use DynaVibe to objectively measure whether the fan wheel has a significant imbalance that may slowly but steadily be creating a fatigue-crack time bomb. A fan wheel vibration check is done with the same accelerometer and optical tach used to balance the main rotor, by simply moving the optical tach and left accelerometer to the fan, with the accelerometer typically pointed toward the centerline of the fan rotation as shown (the DynaTrack optical blade tracking accessory is not required for this procedure). Because in-flight aerodynamic factors are not involved, the entire procedure is typically done using ground runs exclusively, without hover or flight runs. 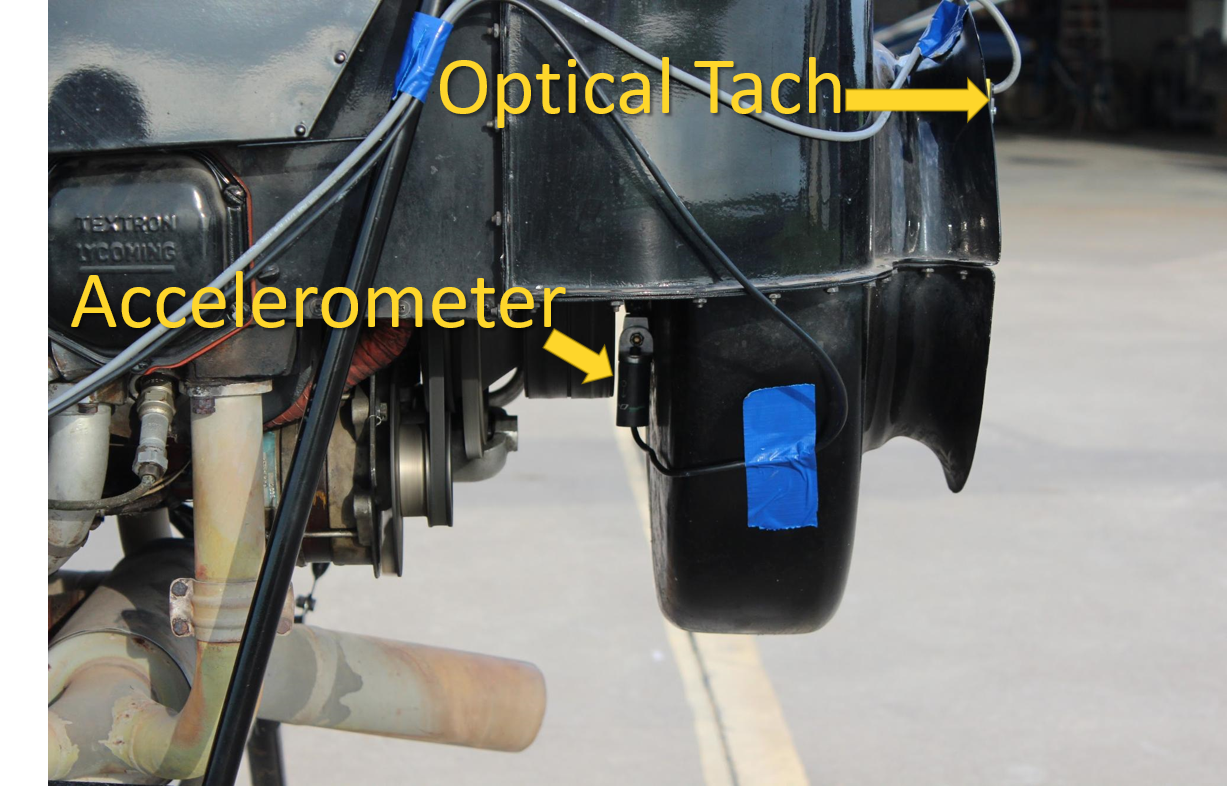 This image shows the optical tach (upper right) and accelerometer (near center) affixed to the fan housing for a fan balance procedure. The positioning will vary depending on the helicopter model and helicopter manufacturer's instructions. If the analysis shows that the fan is outside of the acceptable balance parameters, the DynaVibe system will step you through the balancing procedure. Follow the helicopter manufacturer's procedures. It may be helpful to refer to the RPX supplemental DynaVibe user manual and helicopter-specific application notes to assist with DynaVibe setup and operation.
Select the "Contact Us" link near the bottom of this page to discuss fan balancing with an RPX representative or to learn more about RPX helicopter track-and-balance solutions. 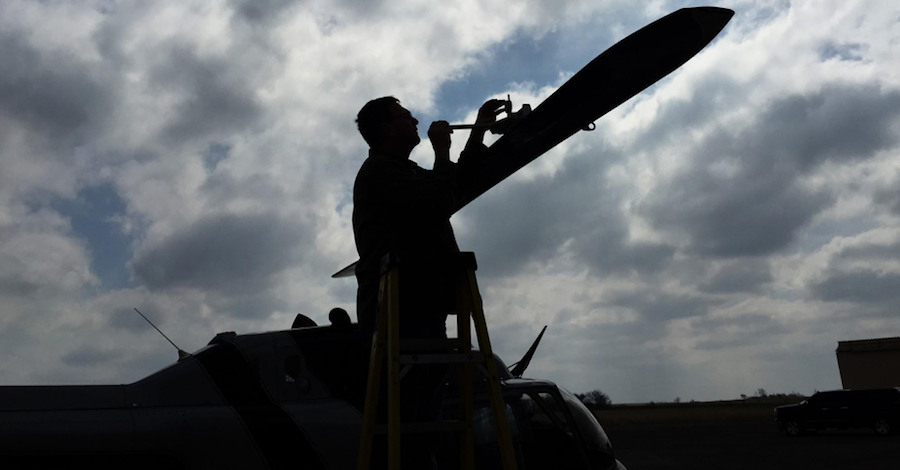 Using a trim tab gauge As a provider of dynamic prop balancer, aircraft vibration survey, and helicopter track-and-balance systems to the aviation maintenance industry, we meet a lot of great people who are interested in high-quality maintenance work while minimizing maintenance costs. Our experience has revealed a maintenance procedure where cutting corners can be costly: making helicopter trim tab adjustments. Here are some tips about this procedure that may prevent wasted time and unnecessary expense. Tip 1: Use High-Quality Trim Tab Gauges Helicopter mechanics need high quality trim tab gauges and, in some cases, the gauge is specified by the manufacturer for a particular blade set. The best trim tab gauge designs for most rotorcraft blades utilize dial indicators on a frame that attaches to the blade in a very repeatable way. These types of trim tab measurement instruments support accurate and reproducible measurements of the blade tab position. 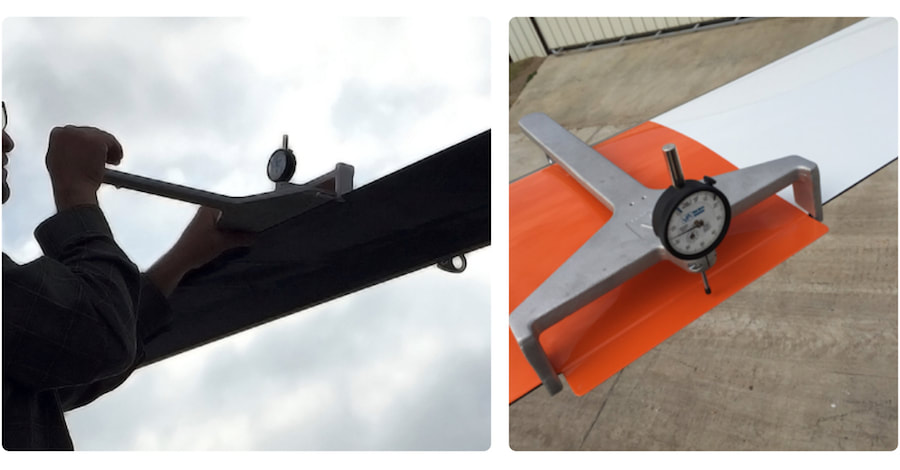 Trim tab gauges This trim tab measurement reproducibility is critical when it comes to tracking blades. Before making any adjustments, the mechanic should verify that the same measurement can be made repeatedly. The mechanic should be able to put the trim tab gauge on the blade, make a measurement, remove the gauge, and repeat this sequence two more times, obtaining the same position result every time. If the measurements aren’t repeatable, the mounting technique should be reviewed and the tool should be checked to verify that it is functioning properly, and that it is the correct one specified for this blade set. Verifying that the gauge readings are reproducible before making the first tab adjustment can save many hours later. In addition to reproducibility, trim tab measurement accuracy is also important because incredibly small adjustments can affect forward flight vibration. For a Robinson R22, a 0.015” tab adjustment can produce almost a quarter of an inch change in blade track. This is more than enough to cause a noticeable increase (or decrease) in vibration. Tip 2: Use Recommended Tools for Tab Bending Use the recommended tab adjustment tool when bending blade trim tabs. A lot of improper tools are used to make adjustments, from vice grips to sledge hammers (really). It is extremely important that the manufacturer’s recommended tools are used to adjust trim tabs and keep in mind that a tab bending tool appropriate for one set of blades may be the wrong tool for a different set of blades. 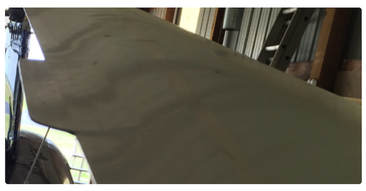 Trim tab on a blade Robinson trim tabs, for example, should not be adjusted by simply applying torque to the tab about the tab’s root. Robinson trim tab adjustments are produced by more of a curling action resulting from three precisely applied forces that are generated by Robinson’s tab bending tool as shown below. 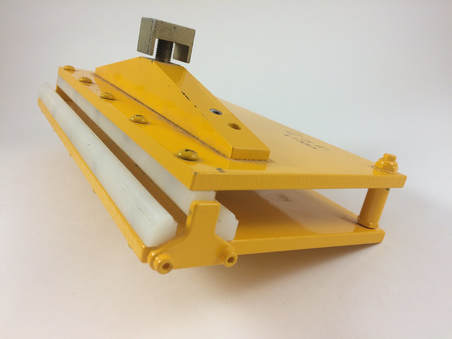 A specialized tool for adjusting a Robinson trim tab If tabs are bent improperly, the result can be costly. For instance, one mechanic thought that the trim tab on a Robinson was adjusted just like many other blade tabs, simply by bending the trim tab down. After a couple of flexing adjustments using the wrong tool, the rotor blade responded with a loud pop and an expensive replacement bill. There is a reason that Robinson sells a custom device for adjusting their trim tabs. More Information An underlying question for both of these tips is: how can you know the proper adjustments to make to helicopter trim tabs? The answer is given by the blade offsets measured by the DynaTrack, the vibration measured by the DynaVibe accelerometers, and the procedures in the helicopter manufacturer’s maintenance manual. However, if the mechanic doesn’t have the correct tab bending tools and trim tab gauges to make these adjustments safely, precisely, and accurately then the process will take longer at best and could be a costly mistake if the tabs are bent improperly. Select the "Contact Us" link near the bottom of this page to learn more about RPX helicopter track-and-balance solutions.
As a business owner, you strive to grow your company, increase revenue, and reduce costs. One way to do all three is to purchase the right equipment for use in your trade or business. In many cases, you can do this through a Section 179 deduction.  Within the rules of Section 179 of the IRS Tax Code, a business may be able to legitimately deduct, for the current tax year, the full purchase price of qualifying equipment placed into service before December 31st of the year the deduction is to be taken. Before making a new equipment purchase, talk with your tax adviser or CPA to see to if your business can use the Section 179 deduction for a tool purchase. To learn more about Section 179 deduction, read the IRS publication 946: "How to Depreciate Property."
Here are the steps for cutting your tax bill with a DynaVibe purchase:
Must be acquired for business use. Must be acquired by purchase. Tax-exempt organizations, estates, and trusts cannot elect the section 179 deduction. Business income limits may apply. Whether you’re maintaining a fleet of helicopters or a single ship, blade tracking and balancing shouldn’t be a full-time job. When you do pull out your tools to do your next track and balance, will the tools complicate the task, or simplify it? RPX Technologies recently spoke with the mechanic for a county sheriff aviation unit in the southeast U.S. about the right tool for the job and how switching to the DynaVibe GX with DynaTrack made his job easier. The department had previously purchased a competing track-and-balance system, but this mechanic shared that “I'd go for long periods of time and we didn't have to do a track and balance, and then you kind of relearn it every time you do it.” The mechanic recalled that the competing system “was way smarter than I was and a little more complicated than I was used to working with. I struggled through using it a few times and at one point, I contacted manufacturer for a field rep to come and help me again. They were willing to do it, but they were going to charge us an extreme amount of money to do that, to train us. That's the time I figured we needed to start looking at something a little less complicated.” The DynaVibe GX3 balancer when coupled with the DynaTrack optical blade tracking system is efficient, accurate, affordable, and easy-to-use to perform helicopter blade track-and-balance. “We purchased a DynaVibe system,” noted the mechanic. “It's easy to install and set up. To operate it… probably took me less than an hour and 45 minutes to get everything done.”  OH-58 in hover during track-and-balance process. His first use of the DynaVibe balancer was on a ship where the crew had just changed out the main rotor hub. During the initial track and balance process, he found that “the vertical wasn't too bad, but the lateral vibrations were pretty bad,” explained the mechanic. “After I made the PC link adjustment to bring the blade down, that helped the lateral quite a bit. And then on the second run after that, the DynaVibe system told me that I needed to add weights to the blank blade bolt and I did that. You could feel it just getting better on each run. I was impressed. We finished tracking it out and I was really happy with the way the system works.”
The department has multiple OH-58 helicopters and the mechanic’s goal is to always have at least two aircraft available for flight operations. As important is ensuring the helicopters are not degrading the ability of the crew to function. “There's always a primary and a backup aircraft,” explained the mechanic. “Our guys fly missions and they'll do orbits over the target area, and they fly three to four hours a day sometimes. It's easier on them, when they're not getting beat to death by the aircraft being out of track, and it's easier on the aircraft too.” This mechanic summarizes his experience using DynaVibe and DynaTrack: “I’m really happy with the way the system works and everything. The RPX rep called and checked on me to see how my progress was, and we sat and talked about the readings I was getting and everything. I'm real satisfied with the service. There’s a great support system there for the customer, and that's a good selling point for these systems. Kudos to the DynaVibe guys; they’ve got a good product.” Visit the Rotorcraft section of the RPX online store, or click the yellow "Contact Us" tab below to learn more about helicopter track-and-balance solutions. |

 RSS Feed
